 United Kingdom - English
 United States - English
 Ireland - English
 Netherlands - Dutch
 France - French
 Germany - German
 Italy - Italian
 Spain - Spanish
 Belgium - Dutch
 Portugal - Portuguese
 Singapore - English
 Malaysia - English
 Australia - English
 New Zealand - English
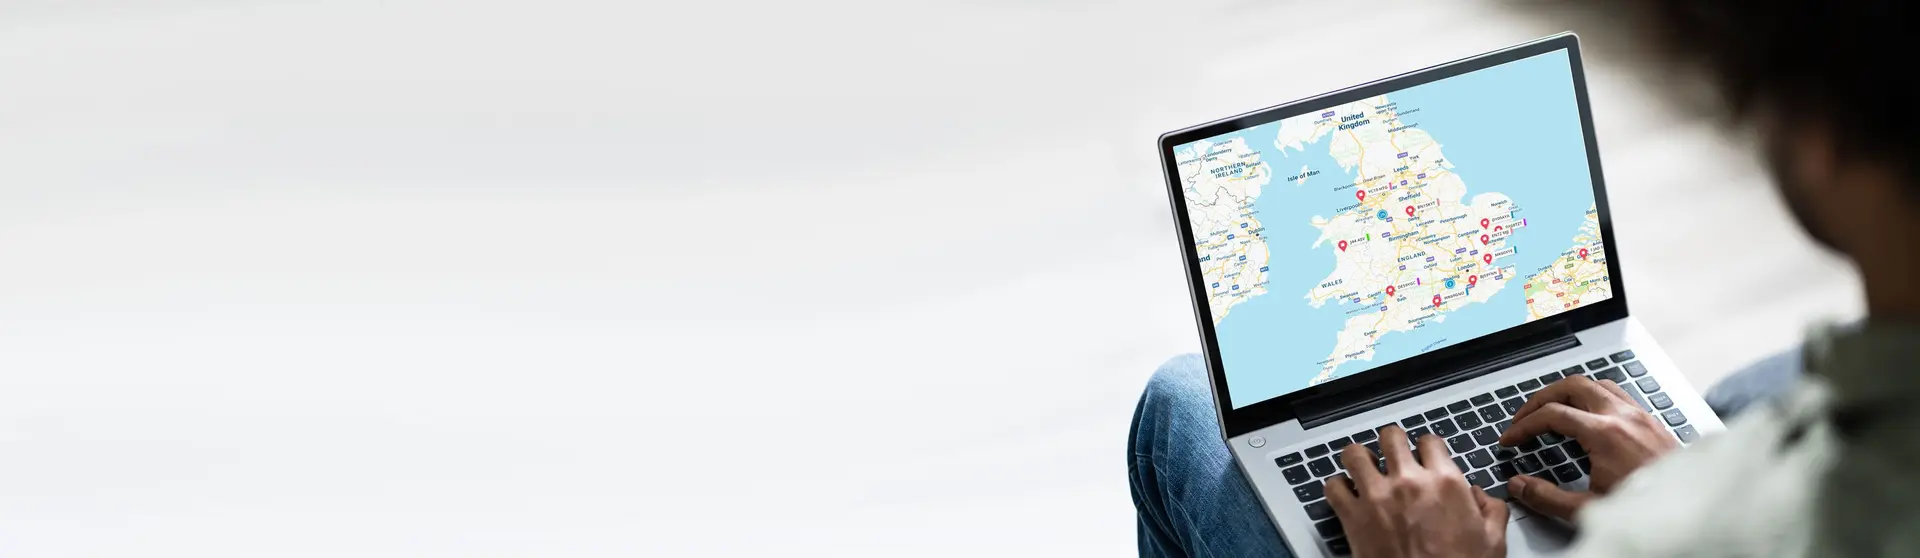
Live map – Kinesis Pro user guide
Live location is an essential feature of asset tracking systems and gives you complete visibility over your fleet.
Table of content
1. Overview
4. Search for the closest asset
7. Asset search
1. Overview
When you log on, the platform will default to the Live Map. From here, you can access more functionality using the left-hand console options (e.g. Alerts, Trip History) or stay on the map and see a live view of your fleet.
2. Viewing Asset information
2.1 Introduction
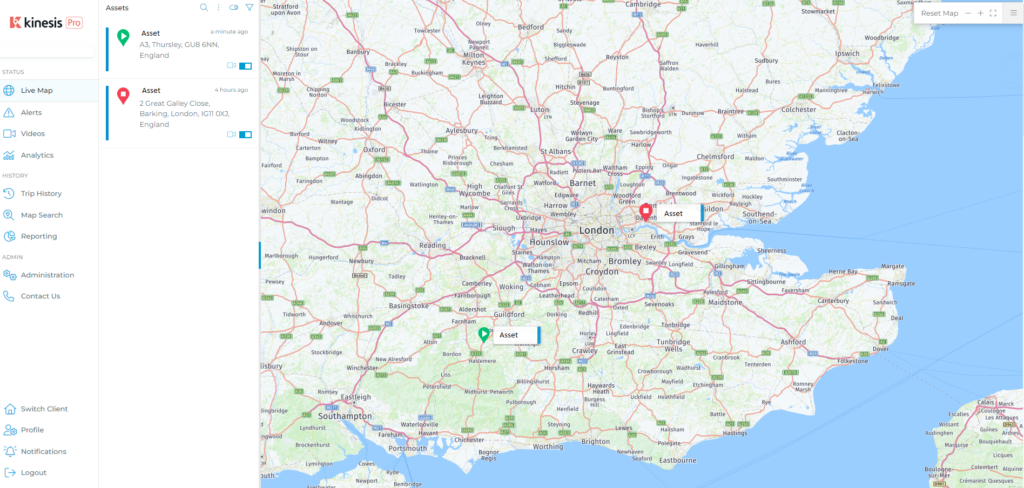
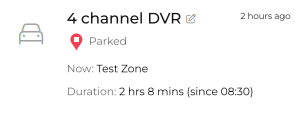
The Live Map view screen is the default login screen for the platform. Assets are listed and displayed on the map in their respective locations.
A lot of information is available on the Overview screen, including Asset Telemetry, Activity, Alerts that have been triggered, etc. Users can also navigate away from the Live Map section by following the options on Trip Replays and Alerts.
2.2 Overview of Asset Activity
The Details tab includes lots of information relevant to the Asset, including historical and current data. It also includes Contact details, Asset States and Custom Field information.
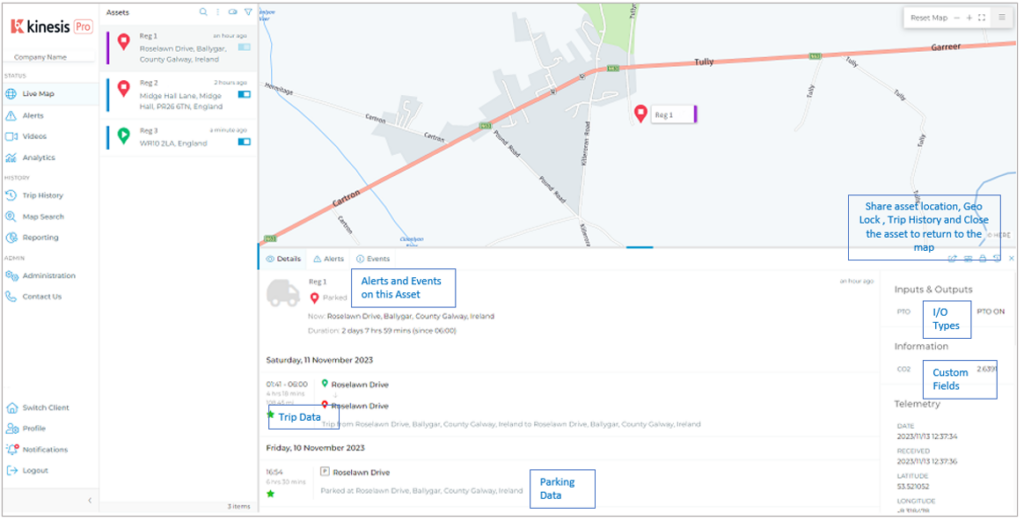
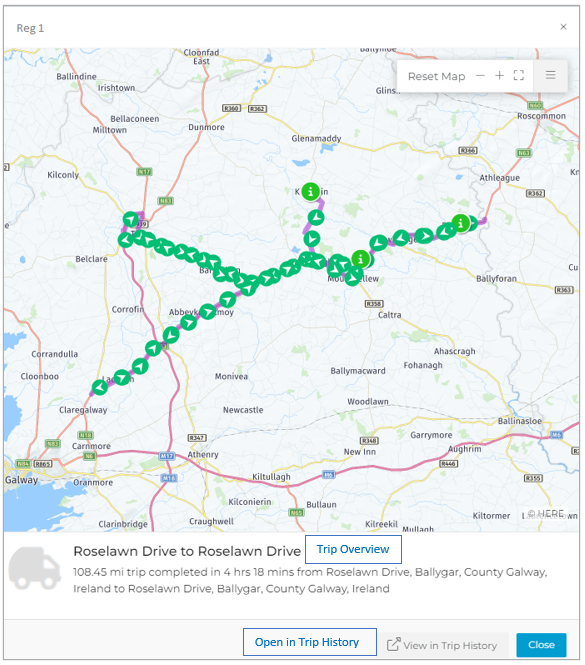
2.3 Trip Data
Clicking on a Trip in the Activity tab opens a pop-up with the Trip information.
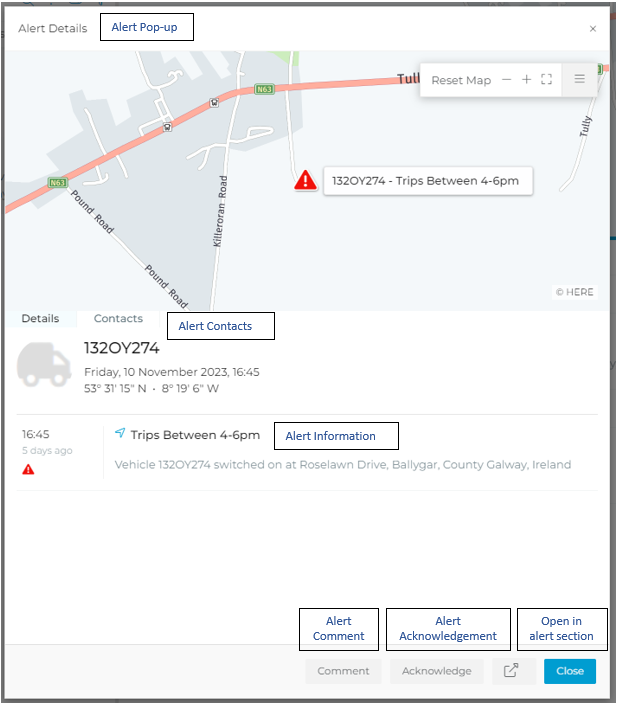
2.4 Alert Data
Clicking on the Alerts tab opens a list of Alerts recently triggered on the Asset.
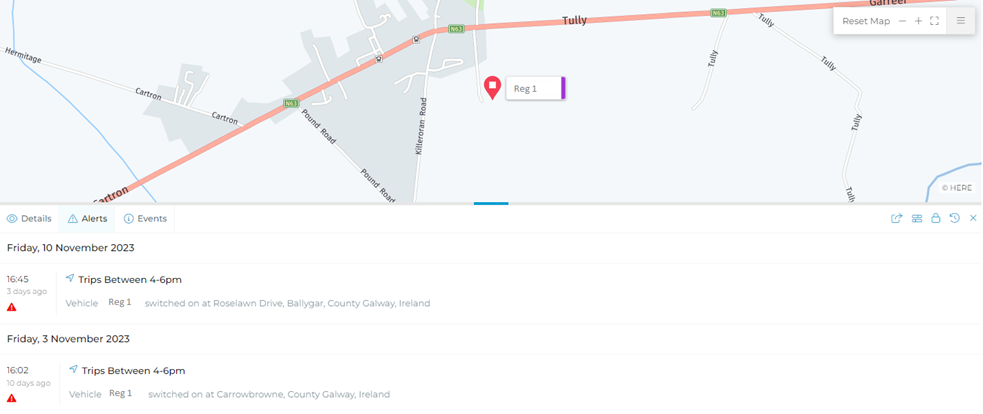
Clicking on an Alert opens a pop-up with the Alert information.
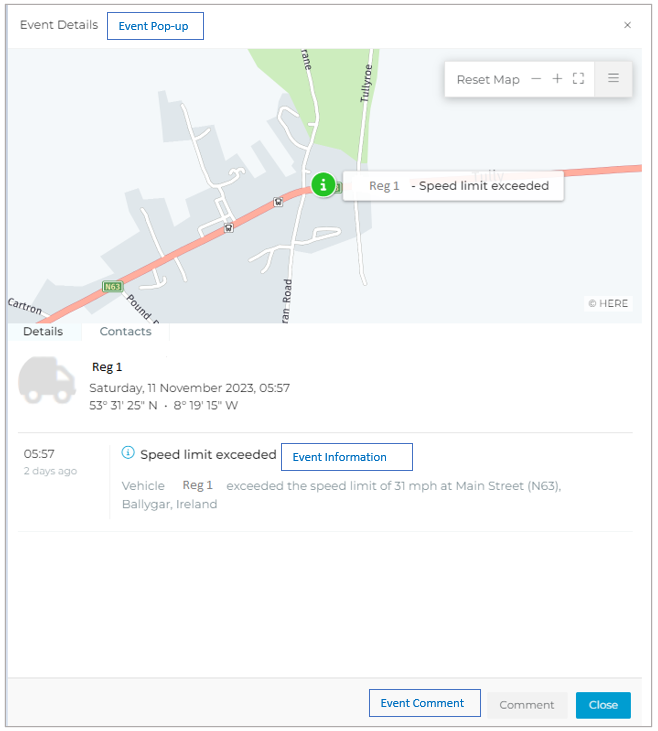
2.5 Event Data
Clicking on the Events tab opens a list of Events recently triggered on the Asset.
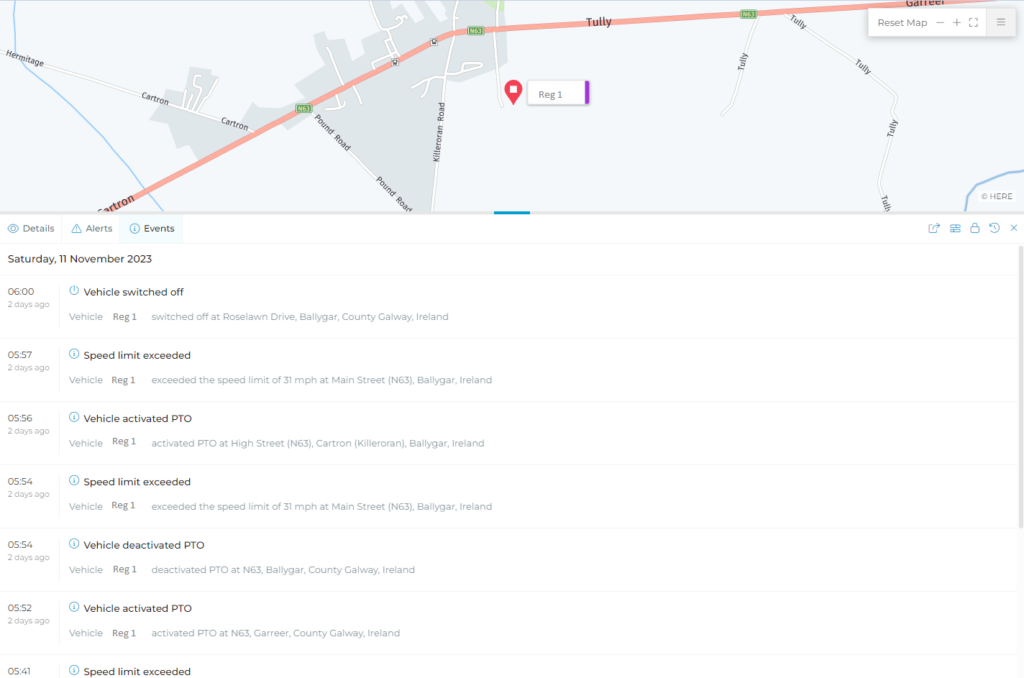
Clicking on an Event opens a pop-up with the Event information.
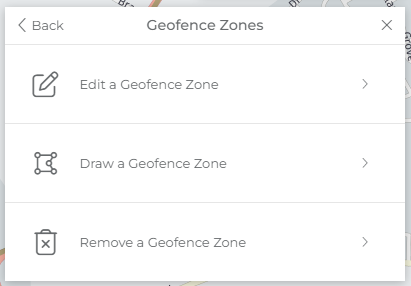
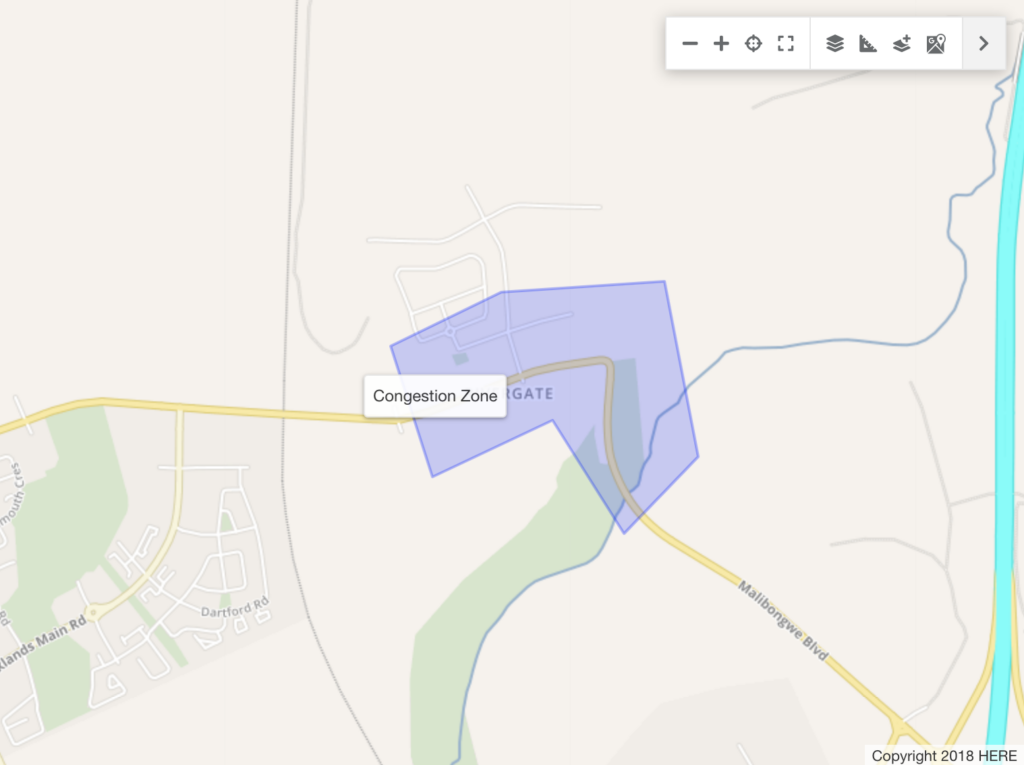
3. Geofence Zones
3.1 Introduction
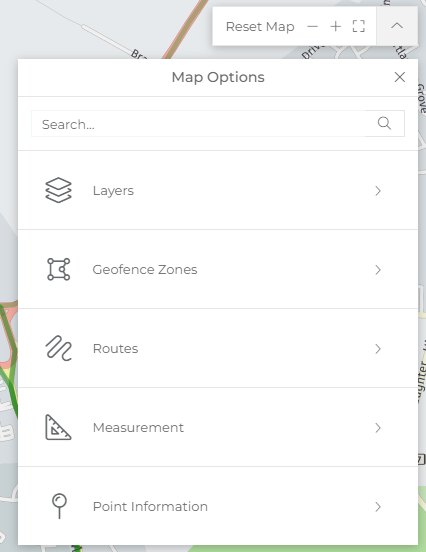
Zones and Routes can be created directly on the map in the Live Map screen of the platform, using tools that allow you to create their own polygon shapes.
Zones can be edited individually under the Zone section in Administration or in bulk.
3.2 Creating Zones
Open the toolbar on the map, choose Geofence Zones and then the Draw a zone polygon icon under the Add layer option.
This changes the mouse into a cursor. Click on the map to add the first point of the polygon.
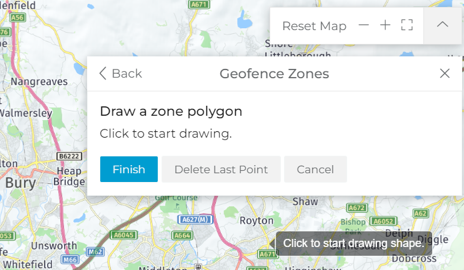
Click the map at intervals to create each point, until the shape is created. If a point is added in the wrong place, click Delete Last Point to remove it, and continue.
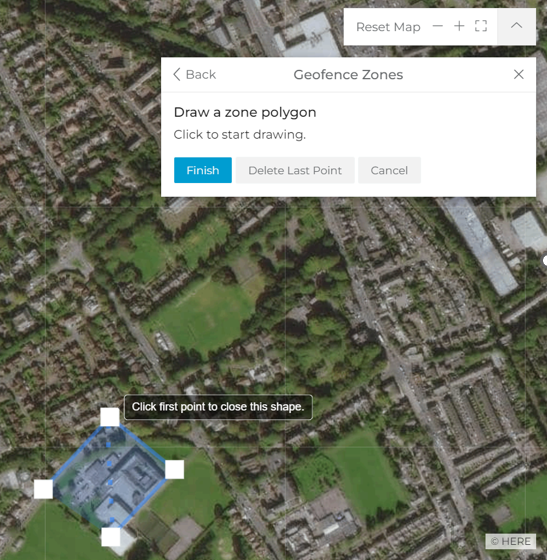
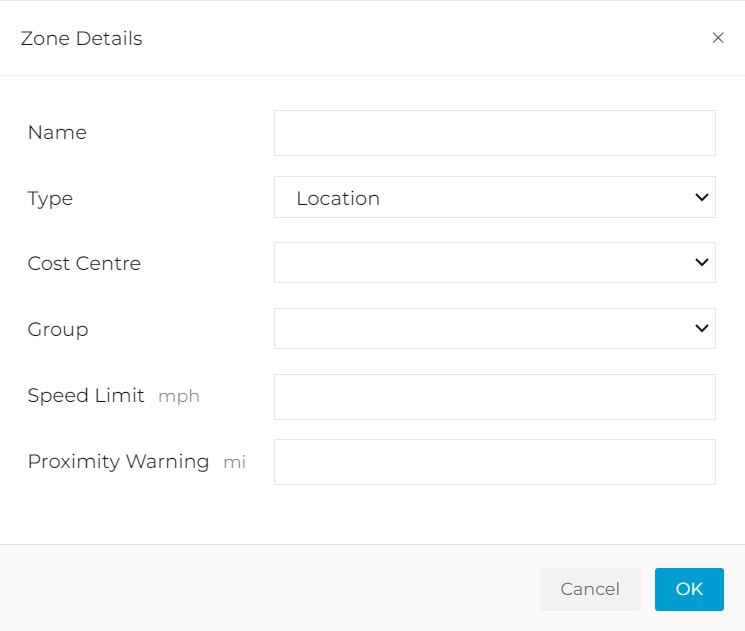
Click on the first point to close the Zone. A pop up will appear, for the Zone Details to be completed. Enter the information and save this when complete.
The Zone will appear on the map and in the list of Zones in the Client.
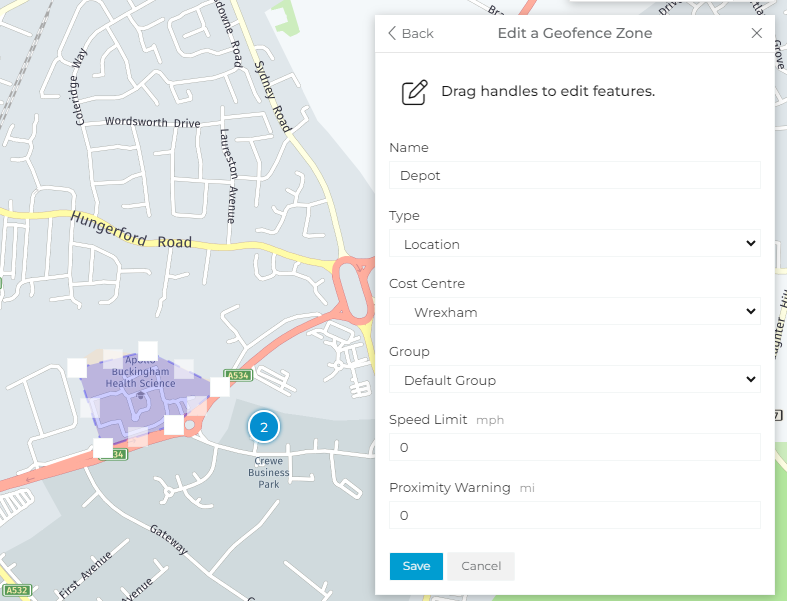
3.3 Editing Zones
If a User would like to edit one or more Zones, they should navigate to those Zones on the map and choose the Edit zones and routes option. Any Zone within the map borders will appear as editable.
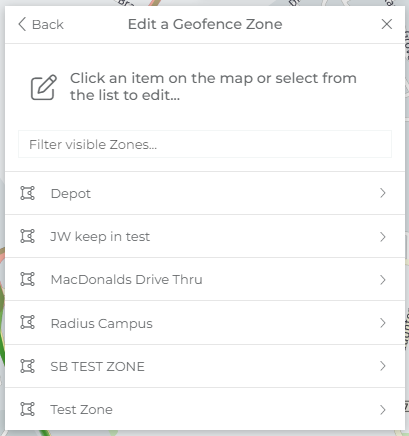
Once the Edit button has been clicked, edit the zones as required. Click Save once completed.
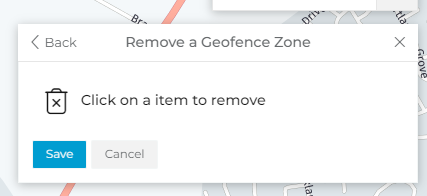
3.4 Deleting Zones
Choose the Remove a Geofence zones option, then choose which zone/s need to be deleted. Clicking the zone removes it from the map. Click Save if correct, or cancel to undo the changes.
4. Search for the Closest Asset
4.1 Introduction
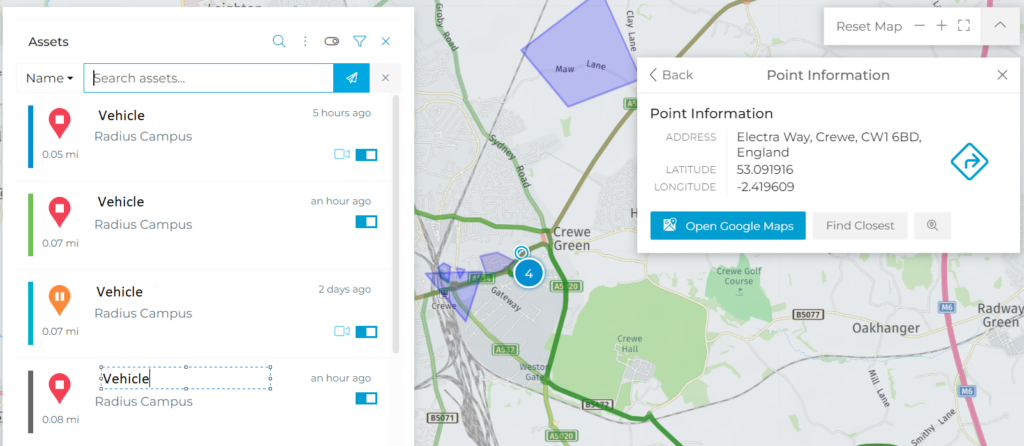
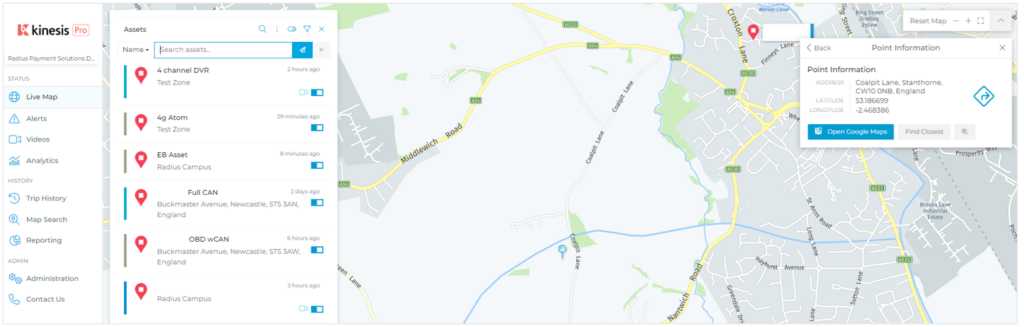
Users can search for the closest asset (as the crow flies) on the Live Map screen. The assets will be reordered according to the distance from the point chosen and indicate the distance from the point in both Column and Grid view.
A few points:
- The software only filters the assets by distance, not when they last updated or whether they are stationary/on the move.
- First, filter the Assets according to need: this could be vehicles or drivers, asset groups and or cost centres.
- Keep or change the asset view.
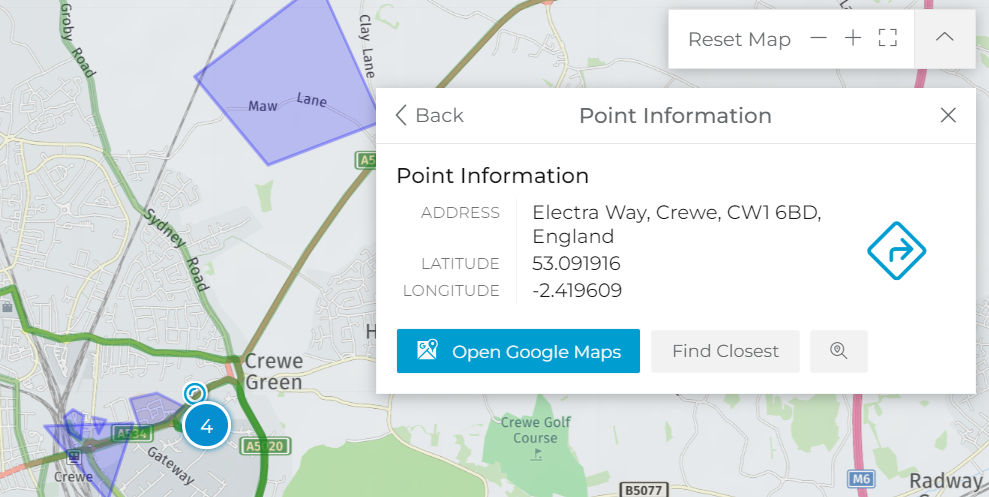
- The feature works using the pin dropped on the map or by right-clicking the map and searching for the closest Asset.
4.2 Using the pin to find the Closest Asset
- . Open the map toolbar and search for the area/postcode/address,
- . Choose the pin and drop this on the result,
- . Click Find Closest,
- . Read the results in the Asset list and check the distances per Asset.
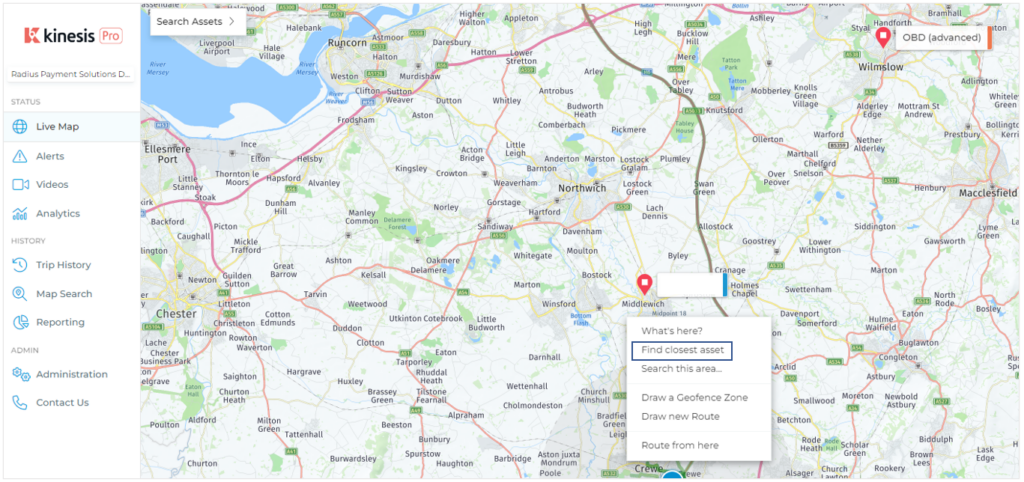
4.3 Using the map (right-click) to find the Closest Asset
- . Open the map toolbar and search for the area/postcode/address,
- . Right-click on the resultant flag or address, etc.,
- . Choose Find Closest,
- . Read the results in the Asset list, and check the distances per Asset
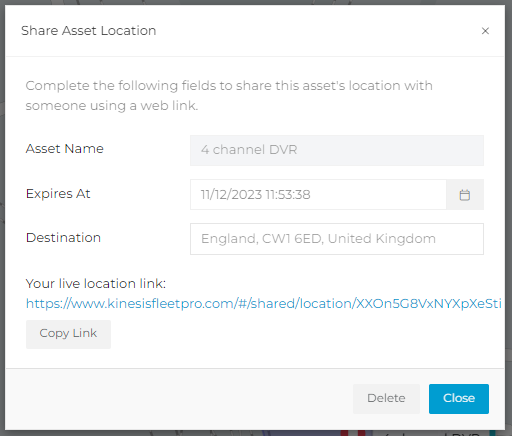
5. Location Sharing
5.1 Introduction
Live Asset locations can be shared from the platform, via a link, to non-platform users. These links are valid for a set time period, chosen by the sharing party.
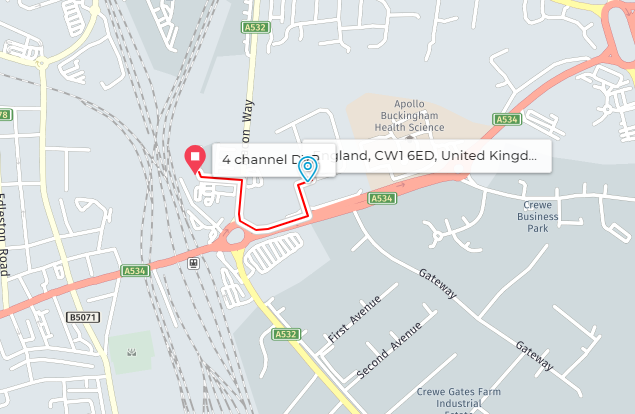
The link includes the name of the Asset, updated positions as the Asset updates, and general routes the Asset may be taking to the destination. Once the time limit expires, the link will become defunct.
5.2 Creating and Opening a Link
- . Click the Share button.
- . Enter the time frame and destination address into the box.
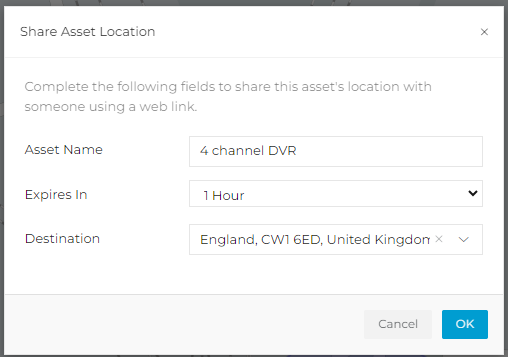
3. Copy the Link and share it with anyone.
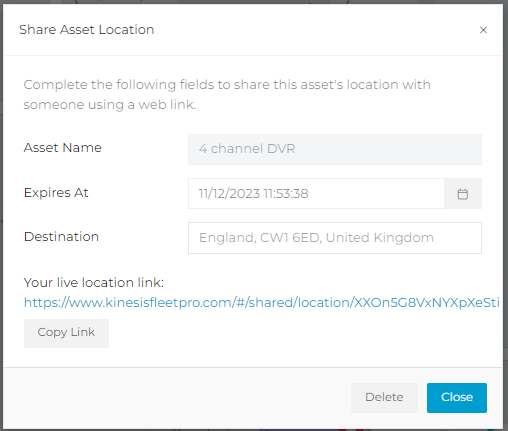
The person can open the link in any browser, whether on a phone, tablet or PC.
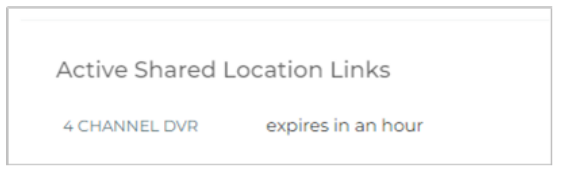
5.3 Deleting a Link
To cancel sharing before the scheduled expiry time is reached, follow these steps:
1. Navigate to the Asset in the Live Map Screen
2. Click on the “ACTIVE SHARED LOCATION LINKS”
3. Delete the link. The link will no longer be shared.
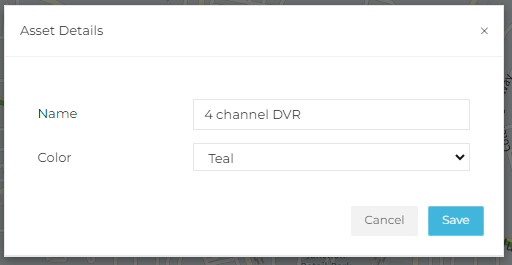
6. Edit asset Information
6.1 Introduction
Users are able to Edit Asset Names and Colours on the Live Map screen, instead of having to navigate to the Administration Tab. This allows the flexibility to turn Administration off, but allows Users the ability to change the names if needs be.
N.B. only Users with editing rights (Create) will be able to use this feature.
6.2 Editing the Information
To edit the Asset information:
1. Hold your mouse over the Asset Name on the Live Map screen. An Edit option will appear.
2. Edit the information needed.
3. Click the Save button
7. Asset search
7.1 Introduction
The Overview Asset Search feature can be used to find an Asset based on it is:
- Name
- Linked Device Serial/IMEI
- Any Asset-related Custom Field
7.2 Using the Search Function of Asset Activity
To search for an Asset based on any of the above,
1. Click the magnifying glass (search function),
2. Choose the item related to the search from the drop-down, left of the text box,
3. Enter the text, and
4. Hit enter or click the send button.

Keep learning
Need help?
Use our help me choose wizard or contact us on one of the options below.